Compare Your Painting to the Reference Photo
You have your grid in place and the drawing is done, maybe you have already started painting. At some point you want to check how close you are to the reference. Are the proportions right? Did something shift slightly? Does something feel off but you cannot quite tell what it is?
Uploading a progress image and comparing it to the reference makes these problems much easier to spot.
1. Upload a progress image
In the Progress images section, click the + button.
You can:
- Browse and upload an image from your device
- Take a photo directly
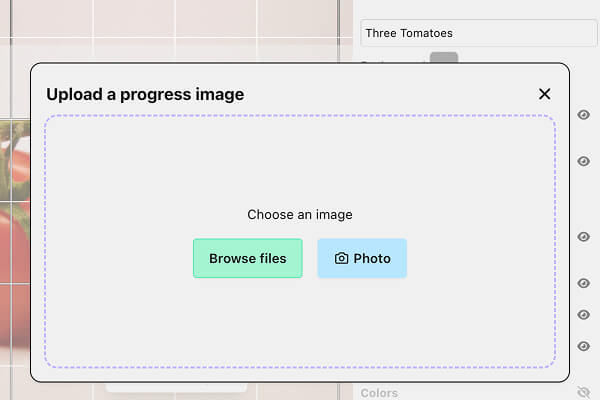 Upload a progress photo to compare your drawing or painting with your reference
2. Edit the progress image
To get rid of small distortions, rotate the image as necessary, adjust the perspective and crop off the background and save the picture.
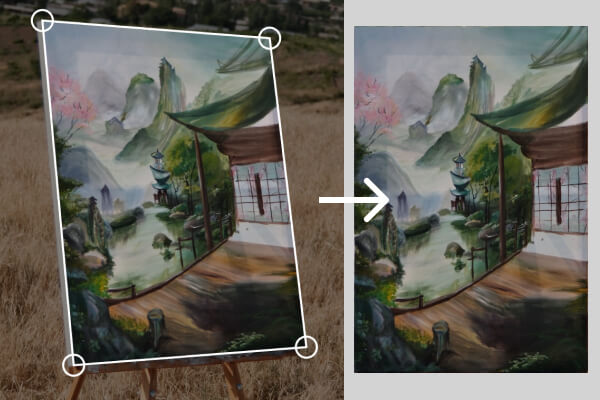 Adjust perspective or so that the canvas is best visible
3. Align the progress image
Now that you saved your edits, the picture will appear on top of your reference.
Make sure your progress image matches the canvas frame and the reference image.
Only the part inside the frame is visible, so anything outside will be cropped. Adjust your image until it lines up as closely as possible.
If needed, adjust your frame first so it matches your painting proportions.
Learn how to adjust canvas frame / crop image
4. Adjust transparency
Use the transparency slider to make the progress image partially transparent.
This lets you see both:
- Your painting (on top)
- The reference image (below)
You can quickly spot:
- shifted proportions
- incorrect angles
- misplaced elements
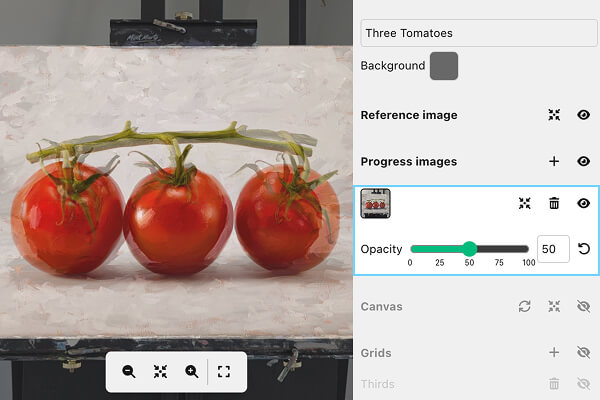
5. Toggle visibility
Turn the progress image on and off.
This makes it easier to compare:
- with overlay (alignment check)
- without overlay (overall impression)
Switching between the two often reveals mistakes immediately.
6. Toggle animation
Animation will turn the progress image on and off several times in a row. This helps to spot the differences. Sit back, watch, and notice. After several blinks, it will become apparent what can be adjusted.
7. Use multiple progress images
You can upload several progress images.
For example:
- initial drawing
- block-in stage
- later painting stages
Turn them on and off as needed and adjust transparency to compare different stages of your work.
You can also animate them to appear in order or all at once.
Tips for taking a good progress photo
A good photo makes comparison much easier.
- Keep the camera parallel to the canvas to avoid distortion
- Avoid shooting at an angle
- Use even lighting without strong shadows
- Fill the frame with the painting
- Keep the same position and lighting for consistent comparisons
Don't worry about small perspective errors or a slight camera tilt - these can be fixed in the editor.
Frequently Asked Questions (FAQ)
Upload a reference photo and start painting!
Try Paint From Photos and simplify your painting process right now!